Auto Shape Dialog
Purpose
Automatically creates simple shapes such as cylinders and boxes.
How to open
- Click the
Auto Shapebutton in the Insert tab > Model group of the ribbon menu. - Double-click the
Auto Shapeitem in the Project Explorer. - Double-click the
Auto Shapeitem in the Workspace.
Dialog layout
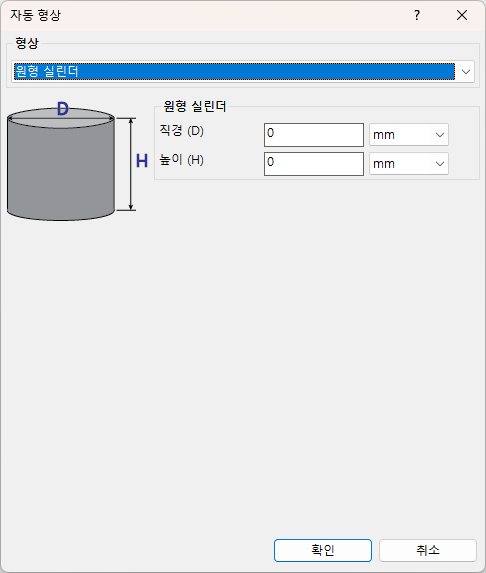
Input data
Type- Select the shape with which the model will be created. The input fields below change according to the selected type.

Circular cylinder
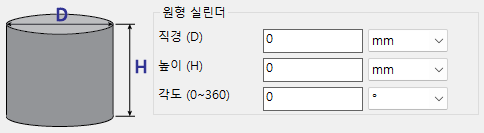
Diameter- Enter the diameter of the cylinder.Height- Enter the height of the cylinder.Angle- For athree-dimensionalmodel, enter the angle.
Pipe
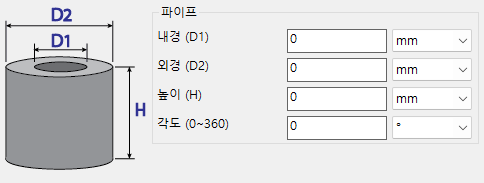
Inner diameter- Enter the inner diameter of the pipe.Outer diameter- Enter the outer diameter of the pipe.Height- Enter the height of the pipe.Angle- For athree-dimensionalmodel, enter the angle.
Box
Enabled only for three-dimensional models.
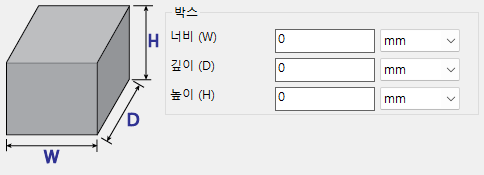
Width- Enter thewidthof the box. (length in the x direction)Length- Enter thelengthof the box. (length in the z direction)Height- Enter theheightof the box. (length in the y direction)
Sphere
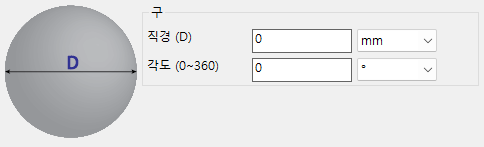
Diameter- Enter the diameter of the sphere.Angle- For athree-dimensionalmodel, enter the angle.
Elliptic cylinder
Enabled only for three-dimensional models.
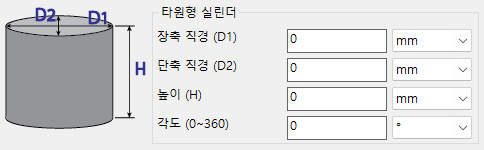
Major axis diameter- Enter the major axis diameter of the cross-section of the elliptic cylinder.Minor axis diameter- Enter the minor axis diameter of the cross-section of the elliptic cylinder.Height- Enter the height of the elliptic cylinder.Angle- Enter the angle.
Guide roll
Creates a guide roll for a ring rolling process.
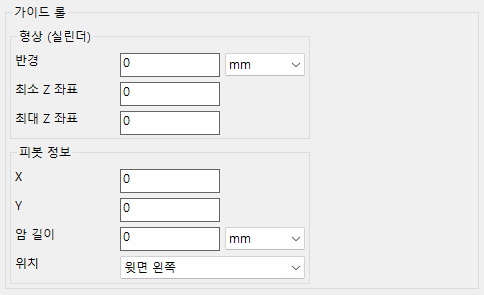
Shape (cylinder)
Radius- Enter the radius of the cylinder.Minimum Z coordinate- Enter the minimum Z coordinate.Maximum Z coordinate- Enter the maximum Z coordinate.
Pivot information
X- Enter the X coordinate of the pivot.Y- Enter the Y coordinate of the pivot.Arm length- Enter the arm length.Position- Indicates the position of theguide rollrelative to the workpiece.

Buttons
OK- For a newly created shape, the shape is created in the Workspace; if an existingAuto Shapewas opened, its values are updated.Cancel- Closes the dialog without saving the changes.
Cautions
Warning
Diameter / Height / Angle and similar fields must be entered with values greater than 0.
Note
For hot forming, the values must be entered taking the elongation of the workpiece into account. If you enter the cold-sheared billet size, you must enter Volume expansion > Elongation in the Stage Numerical dialog.