Post Selection List
Nodes can be added to the list by entering a node number, and node lists can also be added through the Data Extraction dialog.
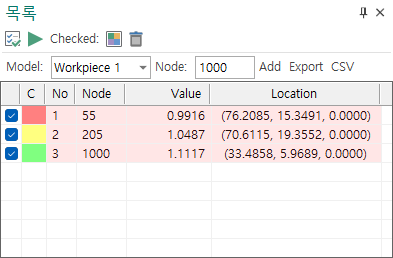
Toolbar
Select All- Selects or clears all items in the list.Tracking- Tracks the values of the selected list entries. The results appear in the Tracking Graph pane.Color- Opens acolor dialogfor choosing the color of the selected item.-
Delete- Removes the selected item. -
Model- Selects a shape. Node- Enter a node number.Add- Finds the node with the entered node number on the selected model and adds it to the list below.Export > CSV- Saves the contents of the list to aCSVfile.
List
Check box- Checks or clears an item. This button is linked to the Tracking Graph (show/hide).C- Short for Color; clicking it opens the color selection dialog.No- The Id number of the current item.Node- The node number. If an arbitrary position is picked in the Data Extraction dialog, the entry is added with this field blank.Value- Prints the post-processing result value at the current position.Location- Prints the coordinates of the current position.